Showing posts with label patio. Show all posts

Sunday, July 01, 2012

Garden Faucet

The other week, I managed to replace the water valve in the back of our house that had been leaking for years. Turns out I was going about it all wrong at first.

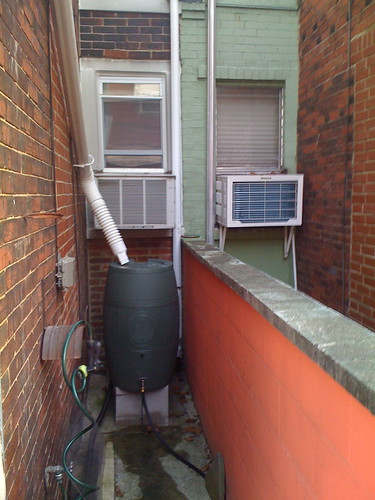
The original water valve, minus its handle.
As you can see from the picture above, it looks like I should be able to unscrew the water valve from the L joint right at the top of the pipe. However, years of corrosion meant that valve wasn't going anywhere. Best I could do was get the handle off.

I asked for some advice on Facebook, and got a ton of responses: use a different wrench, put a pipe over the wrench to get more leverage, use penetrating oil, heat the valve, hit the valve with a hammer, etc.

The leverage suggestion made the most sense, but the problem with that is that I was bending the pipe, even with the relatively small wrench I had on hand. Adding more leverage would just cause me to bend it more. I decided to start with the penetrating oil. Unfortunately, that didn't work at all, and I ended up using too much force and bending the pipe significantly. I hadn't broken it yet, but I was close. No more force.

While considering the heat option, I realized that maybe I should stop messing around with the valve, and concentrate on the L joint below it. There was another project where I had to replace the valve to this same pipe on the inside of the house (never got around to writing that one up - sorry). My friend Jim actually did most of the soldering on that job, but I still had all the tools in the basement, so I brought them up.

Ready to solder. The trowel went unused.
After a lot of heat and some vice grips, the L joint lifted straight off the pipe.

Slightly bent, but unbroken.

This thing was about 5 billion degrees fahrenheit at the time this photo was taken.
Once the pipe cooled, I prepped it for the new L joint by sanding the top of it and adding flux. I did the same to the L joint itself. Then I fit them together and started heating the joint with the torch. After about 2 minutes, I touched the solder to the joint and it pretty much did all the work itself - it ran around the joint on its own. I added a little extra to the back where I couldn't see just to be sure, and then let it cool again. It all seemed to easy, and I was pretty sure it was going to leak.

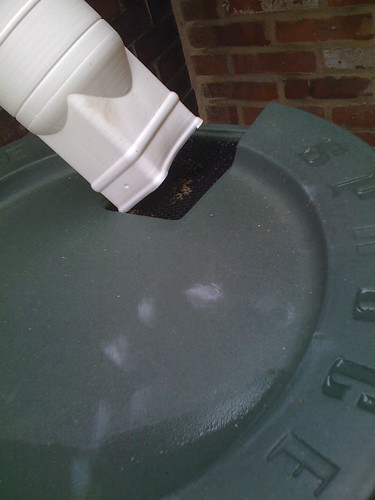
Note the option to attach it to the wall with the screws. Definitely going to take advantage of that this time.

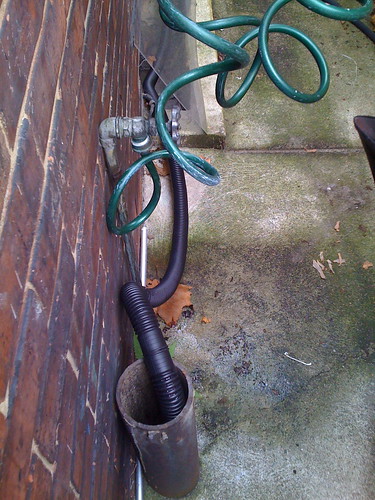
Finally, I added some teflon tape to the valve and screwed it into place. I went down to the basement, turned the water on, came back up, and would you believe it - no leaks. I think I lucked out.

Works like a charm.

Friday, August 28, 2009

Rain Barrel

Update
We had a pretty big rain storm yesterday afternoon, and all I can say is, wow, that barrel fills up fast! I guess 54 gallons isn't that much when you're talking about the amount of rain that lands on your roof - it took about 20 minutes. Everything worked as it should, although the barrel reached its full capacity just as the downpour was at its heaviest, and the overflow hose couldn't handle the deluge. Water poured over the top of the barrel onto the ground, although this wasn't too big of a problem since the concrete below slopes directly to another storm drain 6 feet away. Once the rain leveled off to a moderate level, though, the overflow hose was able to handle the excess water with no difficulty. Here's a quick video of the rain barrel in action during moderate rainfall:


Today we tested out the soaker hose to slowly drain the barrel while watering the garden, which worked like a charm. The weather forecast calls for some more thunderstorms today, followed by a whole week of sunny skies, so it'll be nice to have the rain barrel to carry us through the dry period.


Philadelphia has a big problem with storm-water runoff, particularly in South Philly. There are so few trees, parks, and otherwise permeable surfaces down here that when it rains, just about all of that water goes into the sewer system. Parts of our sewer system are OLD. Like, 100 years old. It cannot handle it. I won't go into all the details of how our sewer system works (check out this link for more information), but let's just say that when we have a big rain, water that should be going to the sewage treatment plant ends up spilling over into the local rivers and/or backing up into our basements - it's a real problem.

The Philadelphia Water Department (PWD) is trying to do something about that. Rather than digging up all the small-diameter pipes that carry storm water under our streets and replacing them with large-diameter pipes, they're taking a less invasive, more environmentally friendly approach that includes experimenting with permeable concrete, curb bump-outs that allow long stretches of flowers and trees to be planted, and mass giveaways of rain barrels. Yep, they're giving them away through workshops that they're having all over the city. The rain barrels collect water that's running off your roof and headed toward the sewers. So far, PWD estimates they've given out over 1,500 rain barrels, keeping over 5 million gallons of water out of our sewers during peak storm times. The water collected in the barrel can be used to water your plants or wash off patio furniture. If you don't use the water, you can at least release it gradually after the storm, when the sewer system is not as stressed.

We got our rain barrel last week, and decided the best place for it would be at the back of the little alley that's formed between our house and the patio wall. However, this meant I would need to reroute the downspout from the front of the alley to the back where the barrel is. Easier said than done.

Our downspout was made up of two 10-foot long aluminum tubes that ran straight down from the roof to the storm drain on the ground. My plan was to remove the lower tube, insert an elbow joint angled toward the back of the alley, and then insert the second tube into that. At the end would be a short, flexible piece of plastic downspout that would angle right into the barrel.

After a trip to Home Depot for the supplies, I got to work. It was 7 PM - about an hour of daylight left. I began by trying to separate the lower downspout from the upper downspout. They were connected together really tightly. What they were not connected to tightly was the wall of the house, and the whole thing came crashing down. I spent the remainder of the daylight trying to separate the two downspouts without damaging them (which I eventually did) and then putting it back up temporarily until I had more time to assemble things properly. This involved Betsy standing on a ladder holding the downspout up while I stood on the patio wall and tried to hammer in a temporary holding spike while not hitting Betsy in the head. Success on all counts, just as we lost all daylight.

The next day after work, things went more smoothly. I connected the elbow to the upper piece of the downspout, and mounted it back onto the wall of the house. The lower part of the downspout ended up being to long, so I had to cut it with a hacksaw. Then I mounted one end to the elbow and the other end to the wall. Finally, I added the flexible piece of downspout and angled it toward the barrel.


Two hoses leave the barrel. One connects to a spigot at the bottom of the barrel. It's a soaker hose that gradually releases water through the material of the hose itself (it "sweats"). This runs along the patio wall and into the garden, where it rests on the ground among the plants. Whenever we want to water the garden, we just turn on the barrel spigot and let the hose sweat for a while.

The other hose is connected to an overflow valve at the top of the barrel and is thicker than a typical garden hose. During a heavy storm, when the barrel fills completely the water will leave through this hose and flow into the storm drain where the water used to go before we got the barrel.


While we were putting this all together, I was reminded of my grandpa, who built a huge concrete cistern behind his house to collect rainwater from the roof. Pipes led from the cistern back into the house, where he used the water for showering and washing dishes - he built this back in the late 70's! The rain barrel is small potatoes in comparison, but I could imagine the fun he had figuring out ways to re-route and re-purpose water.

Now all we have to do is wait for a rain storm and hope the whole thing doesn't fall off the side of the house. I'll keep you posted.

Wednesday, May 02, 2007

Patio Fence


Betsy and I moved in last November, so we haven’t really had a chance to use the back patio all that much. However, we’ve been thinking all along that we might put a privacy fence up along at least one side of the space. There are cinder block walls separating our patio from our neighbors' on either side, but one of them is really low – about three-and-a-half feet high. If the neighbor and I happen to be back there at the same time, we're hanging out together, whether we want to or not. When our neighbors on that side moved away, they told us that a “young couple” had bought the house. We were excited about this, because the average age on our block is about 85. Visions of us all out back grilling and drinking beer together filled our heads. Maybe we didn’t need the fence. Then we met the new guy. In a conversation that lasted 2 minutes, he managed to establish himself as one of the most negative, down-in-the-dumps, killjoy people I have ever met. The fence was on!

Betsy and I paid a visit to the Lowes that Sunday, where we found a pre-built, pre-stained, cedar privacy fence. Our friend Kris had recently built a fence from scratch for her back patio, and although it looked great, it didn’t seem like all that effort was necessary for such a small length of fence. Well, relatively small - the fence was 6x8. Trying to fit it into the back of a small rented pickup truck along with a decent amount of impulse-buy patio furniture was tricky, to say the least. Fortunately, Lowes was generous with their rope and theories on how to secure everything. Still, the precarious nature of the packing job required we roll at about 5 miles an hour all the way home (fortunately, only about a mile).

There was a lip at the top of the concrete wall that was preventing us from mounting the fence flush, so the plan was to attach sections of 2x4 to the concrete wall and then attach the fence to the 2x4s. The 2x4s extended the same distance as the lip at the top of the wall, so everything would sit flush. We had bought a long piece of 2x4 while at Lowes, but it turned out I had enough scrap leftover from an earlier window project to just use that. Since this was going to be outside, I painted the 2x4s with a coat of wood stain. The next day, I pre-drilled Tapcon screws into the 2x4s and and then held them up to the wall one at a time, giving them a few good taps with a hammer. The screws put small dents in the wall, which I marked with a Sharpie. Then, using the special drill bit that came with the Tapcon screws (big thanks to Jim for telling me about that - never would have occurred to me otherwise), I drilled the holes into the concrete. Once the holes were drilled, I lined up the 2x4s and just drilled them in. I was doubtful about how well this would work, thinking the cinderblock might just crumble, but those Tapcon screws held fast.

The fence was about a foot longer than we needed, so using a sawzall borrowed from Jim, I cut through the three backing braces that were holding everything together. Again, this went much smoother than expected. Finally, Betsy helped me get the fence in place. The patio has a pretty serious slope built into it for drainage purposes, so we figured getting the fence level might be difficult. Although the 2x4s seemed well-secured, we weren't too keen on hanging the entire weight of the fence on them. Fortunately, a spare brick lying in the corner proved to be just what we needed. With the corner of the fence resting on the ground and the right corner resting on the brick, we popped the level on top and were amazed to see that it was perfectly level right off the bat. With Betsy holding the fence in place, I drove screws through the fence into the 2x4s. Sturdy as a rock.

I don't expect many other projects to go as smoothly as this one.