 |
| Window trim. |
Thursday, November 28, 2013


Wednesday, November 27, 2013


Tuesday, November 26, 2013


Saturday, November 23, 2013
Day 18
Just a note that we are at the (scheduled) halfway point in this project.
 |
| Still a ways to go, but it's starting to look like a kitchen again. |
 |
| Not much to look at on the inside yet, but the outside of the powder room is really taking shape. |
Friday, November 22, 2013

Thursday, November 21, 2013

Wednesday, November 20, 2013

Tuesday, November 19, 2013

Saturday, November 16, 2013
Day 11
 |
| Gettin' curvy. |
 |
| Installation of something that's been sorely missed every winter: insulation on exterior walls. |
Friday, November 15, 2013

Thursday, November 14, 2013

Wednesday, November 13, 2013
Day 8
 |
| Sadly, minus the dangling Romex cable, this is what our kitchen ceiling has looked like since the day after we moved in. |
Tuesday, November 12, 2013


Saturday, November 09, 2013

Friday, November 08, 2013


Thursday, November 07, 2013

Wednesday, November 06, 2013


Monday, November 04, 2013
Kitchen Renovation/Powder Room Addition
It's been all quiet on the Tape Measure front because we've been saving up for this one - new kitchen and a downstairs powder room (in the dining room). It all starts tomorrow, unless it doesn't, which is what happened today. Stay tuned...
 |
| Our kitchen for the next 6 weeks. |
Sunday, July 01, 2012
Garden Faucet
The other week, I managed to replace the water valve in the back of our house that had been leaking for years. Turns out I was going about it all wrong at first.
As you can see from the picture above, it looks like I should be able to unscrew the water valve from the L joint right at the top of the pipe. However, years of corrosion meant that valve wasn't going anywhere. Best I could do was get the handle off.
I asked for some advice on Facebook, and got a ton of responses: use a different wrench, put a pipe over the wrench to get more leverage, use penetrating oil, heat the valve, hit the valve with a hammer, etc.
The leverage suggestion made the most sense, but the problem with that is that I was bending the pipe, even with the relatively small wrench I had on hand. Adding more leverage would just cause me to bend it more. I decided to start with the penetrating oil. Unfortunately, that didn't work at all, and I ended up using too much force and bending the pipe significantly. I hadn't broken it yet, but I was close. No more force.
While considering the heat option, I realized that maybe I should stop messing around with the valve, and concentrate on the L joint below it. There was another project where I had to replace the valve to this same pipe on the inside of the house (never got around to writing that one up - sorry). My friend Jim actually did most of the soldering on that job, but I still had all the tools in the basement, so I brought them up.
After a lot of heat and some vice grips, the L joint lifted straight off the pipe.
Once the pipe cooled, I prepped it for the new L joint by sanding the top of it and adding flux. I did the same to the L joint itself. Then I fit them together and started heating the joint with the torch. After about 2 minutes, I touched the solder to the joint and it pretty much did all the work itself - it ran around the joint on its own. I added a little extra to the back where I couldn't see just to be sure, and then let it cool again. It all seemed to easy, and I was pretty sure it was going to leak.
Finally, I added some teflon tape to the valve and screwed it into place. I went down to the basement, turned the water on, came back up, and would you believe it - no leaks. I think I lucked out.
 |
| The original water valve, minus its handle. |
I asked for some advice on Facebook, and got a ton of responses: use a different wrench, put a pipe over the wrench to get more leverage, use penetrating oil, heat the valve, hit the valve with a hammer, etc.
The leverage suggestion made the most sense, but the problem with that is that I was bending the pipe, even with the relatively small wrench I had on hand. Adding more leverage would just cause me to bend it more. I decided to start with the penetrating oil. Unfortunately, that didn't work at all, and I ended up using too much force and bending the pipe significantly. I hadn't broken it yet, but I was close. No more force.
While considering the heat option, I realized that maybe I should stop messing around with the valve, and concentrate on the L joint below it. There was another project where I had to replace the valve to this same pipe on the inside of the house (never got around to writing that one up - sorry). My friend Jim actually did most of the soldering on that job, but I still had all the tools in the basement, so I brought them up.
 |
| Ready to solder. The trowel went unused. |
 |
| Slightly bent, but unbroken. |
 |
| This thing was about 5 billion degrees fahrenheit at the time this photo was taken. |
 |
| Note the option to attach it to the wall with the screws. Definitely going to take advantage of that this time. |
Finally, I added some teflon tape to the valve and screwed it into place. I went down to the basement, turned the water on, came back up, and would you believe it - no leaks. I think I lucked out.
 |
| Works like a charm. |
Sunday, June 24, 2012
Still Here
Whoops, that was quite a cliffhanger, wasn't it? Day 1 of a multi-room renovation, and then silence for a year and a half. Did they blow up the house? Thankfully, no, although we still won't be inviting them back. They were here for a little over a week, and they did an acceptable job with the plastering and painting. Certainly better than we could have done in that span of time. However, there was literally no cleanup. There were half-hearted attempts at dust containment at the start of the week, but those quickly fell by the wayside. During the time they were here, it snowed, so slush and dirt was tracked through the house, mixing with the plaster dust that was everywhere. It took Betsy and me three solid days of scrubbing floors and wiping down every surface in the house to get it cleaned up. But that was long ago, and we're over it. All that's left to remind us are the water damage spots on the hardwood floors from whatever industrial-strength steamers they were using. Bastards.
Here are some pics from the middle of that week:
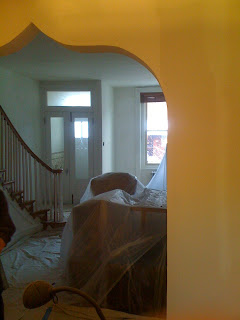


Here are some pics from the middle of that week:


Subscribe to:
Posts (Atom)